There are few steps involved in the hosting of wordpress on google cloud.
Create an instance with WordPress installed
Point domain to google cloud server
Upload files to google cloud
Upload and replace existing MySql file in phpMyAdmin
1.Create an instance with WordPress installed
This is relatively straight forward. First create an account with google cloud. Once completed, there are 2 ways to create the server, or so call instance. We can create an empty instance and install WordPress later. However, the much simpler way would be to create an instance with WordPress installed. To do this, inside google cloud, click the hamburger icon, look for deployment manager. From there look for WordPress installation. There are few WordPress version to choose from. The decision would be on the price and the associate installation packages.
Once decided the installation package, we need to specify the CPU, memory, disk size, network etc. The whole installation would take about few minutes to complete.
At the end of the installation, there would be information about the instance, e.g., ip address, username, password etc.
2. Point domain to google cloud server
There are two ways to do this. For the first method, it involves two servers, namely google and domain name provider server. First go to the google console, inside API and services, look for google cloud DNS API and enable it. Then return to the console, under network services/cloud DNS, start to create zone. Fill in A record and CNAME once the zone created.
The subsequent steps would be done on the domain name provider server. Copy the name servers provided in google DNS zone and fill inside domain name provider server.
For the second method, nothing needed to be done on the google console and no need to enable google cloud DNS API. The domain name could be propagated to google cloud server from domain name provider directly. For this method, use default name server provided by the domain name provider, then start to add record in DNS management page.
3. Upload files to google cloud
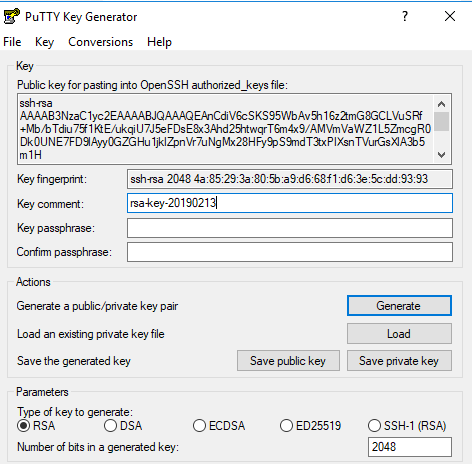
To upload the file we need a ftp client. Here we use Fileziella. As there is no username and password provided to connect to google cloud server, we have to create one using PuTTY Key Generator.
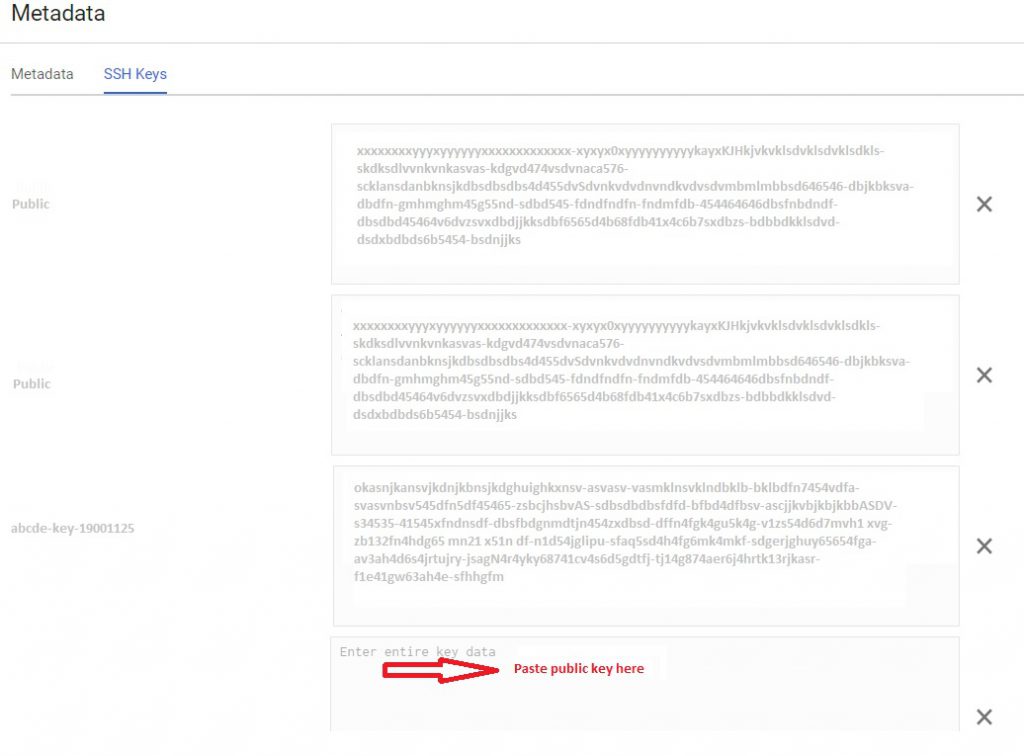
Inside Putty Key Generator, click Generate. Copy the public key and save the private key. Inside Google cloud platform, find the project/instance, metadata/SSH keys. Click edit and paste the public key into the box provided and save.
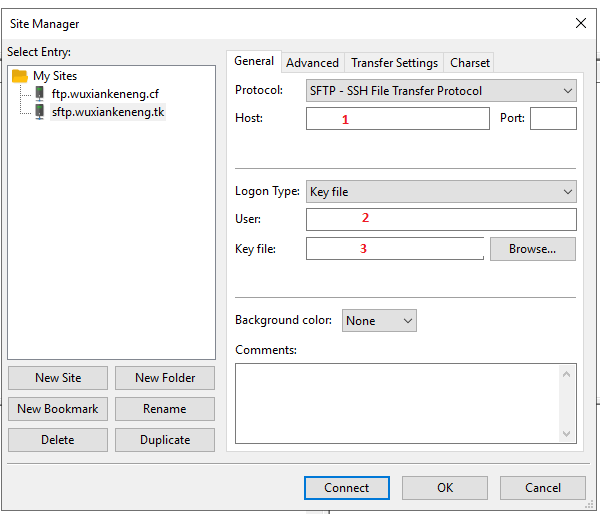
Open Fileziella and fill in 1, 2, 3. Fill the server IP address in 1. For 2, this is key comment from PuTTY Key Generator. For 3, browse and load the saved private key. Click connect and start to upload files.
4. Upload and replace existing MySql file in phpMyAdmin
As it is difficult to create a new database with database name, username, password, it is better to import own database content to the existing database via phpMyadmin. However there is a catch here. The server phpMyAdmin won’t allow direct remote connection. phpMyAdmin must be opened from the local host, i.e., 127.0.0.1.
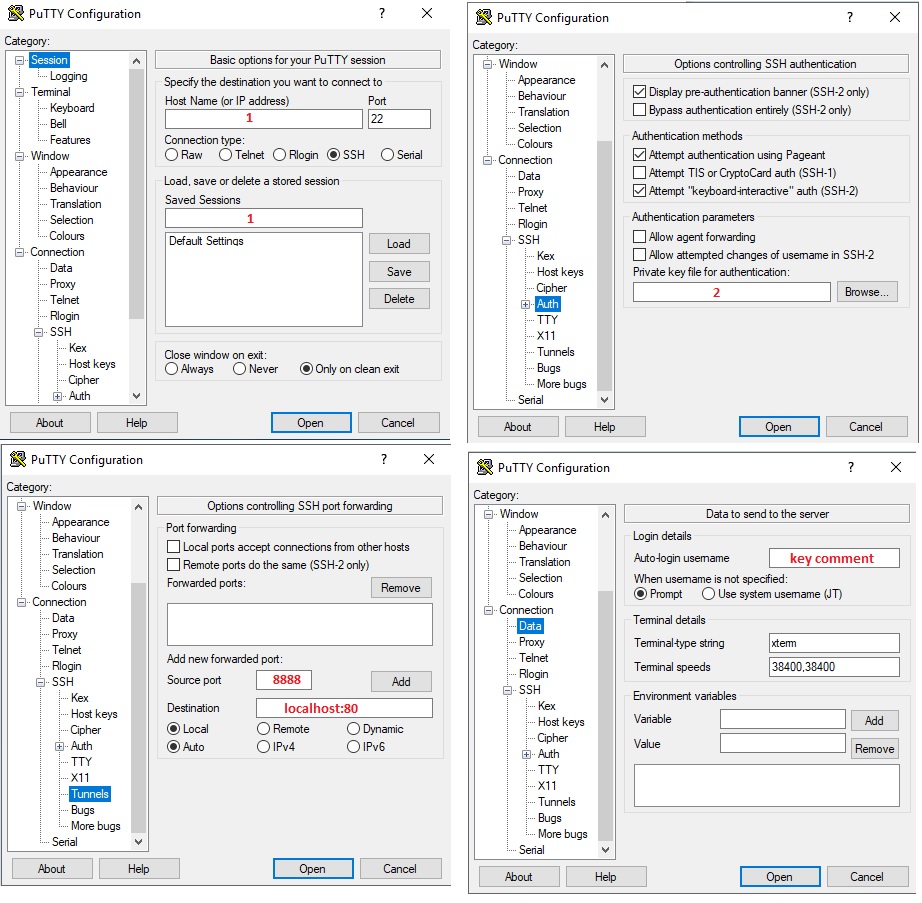
To do this, we need to create a SSH tunnel between remote computer and the server. Here we use PuTTY .
Fill in the server IP in 1.
Browse and load private key generated from PuTTY Key Generator in 2.
Enter 8888 for source port and localhost:80 for destination. If http is redirected to https, use 443 for destination port.
Enter key comment from PuTTY Key Generator in Auto-login username.
Go back to session and click open. This will create a secure tunnel between source 8888 and destination 80 ports.
Open a browser, enter http://127.0.0.1:8888/phpmyadmin
In the phpMyAdmin interface, use root for username and password from google instance[ Admin password (Temporary)] for password.
Inside phpMyAdmin, look for the database. For bitnami installation, the database name looks like “bitnami_wordpress”
Select bitnami_wordpress, drop existing data and import own data to this database.
Under database prefix_options, change the site url and home as needed.
Last, search for wp-config.php inside the server. Change the database table prefix as necessary.